

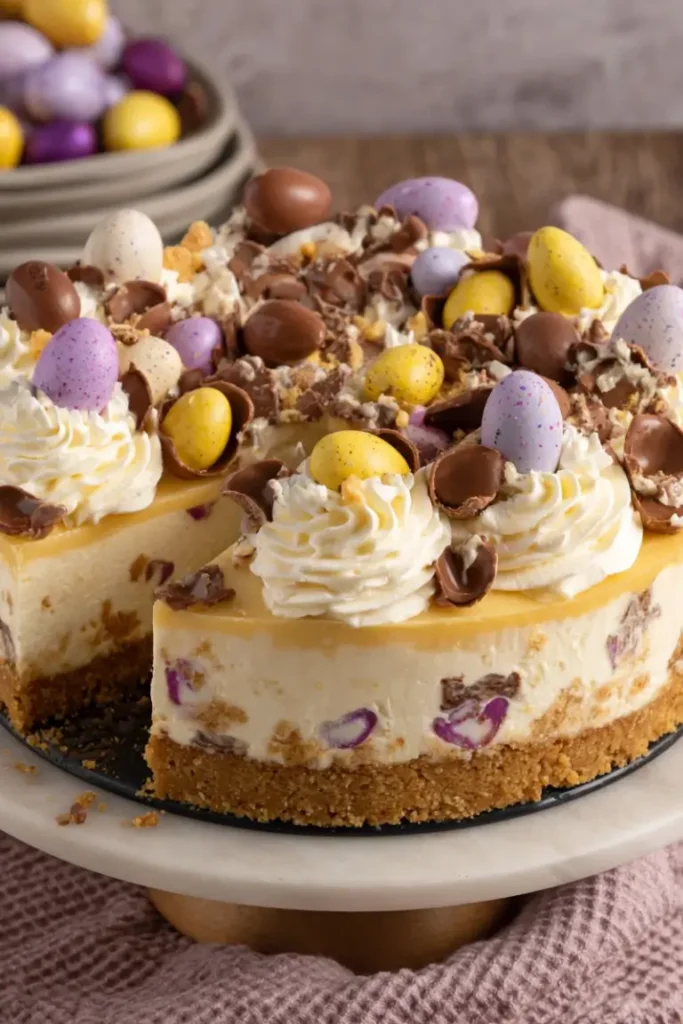
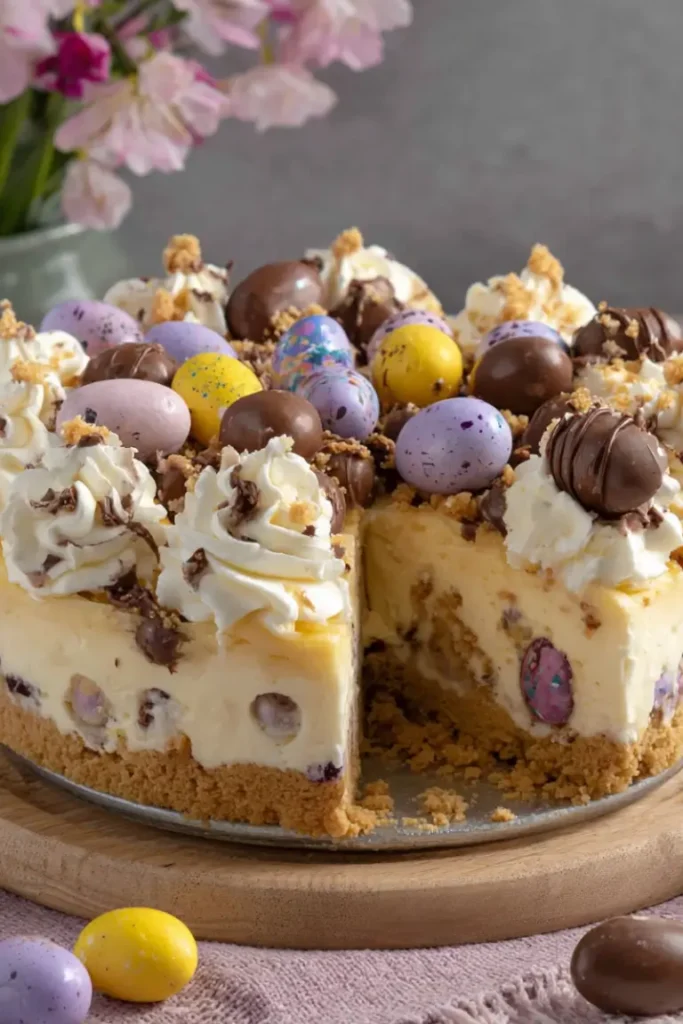
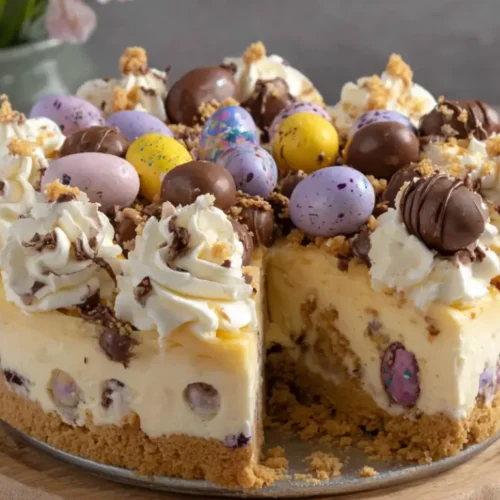
If you’re looking for a fun, festive, and easy no-bake Mini Egg Easter cheesecake recipe, you’re in the right place! This delightful dessert is creamy, indulgent, and bursting with chocolatey Mini Eggs — perfect for Easter celebrations or any spring gathering. The no-bake method means it’s beginner-friendly, and it sets beautifully in the fridge with minimal effort.
Why You’ll Love This Easy No-Bake Mini Egg Easter Cheesecake
- Quick & Simple: No oven required — just mix, chill, and decorate.
- Festive & Colorful: Mini Eggs make it look fun and perfect for kids.
- Creamy & Crunchy: Smooth cheesecake filling on a buttery biscuit base.
- Customizable: Easily swap biscuits or chocolate for dietary preferences.
- Make-Ahead Friendly: Prep it a day or two in advance for easy entertaining.
This cheesecake is a crowd-pleaser that combines creamy indulgence with playful chocolate surprises, making it both visually stunning and irresistibly tasty.
Ingredients for Easy No-Bake Mini Egg Easter Cheesecake
Cheesecake Base
- 280 g (10 oz) digestive biscuits
- 140 g (5 oz) unsalted butter, melted
Cheesecake Filling
- 2 × 280 g tubs full-fat cream cheese
- 600 ml (2.5 cups) double cream
- 140 g (5 oz) icing sugar, sifted
- Juice of ½ a lemon
- 360 g (13 oz) Cadbury Mini Eggs, chopped
Decoration
- 270 g (9 oz) Mini Eggs
- Reserved whipped cream for topping
Ingredient Notes & Substitutions
- Digestive biscuits: Use graham crackers in the US, or gluten-free biscuits if needed.
- Cream cheese: Low-fat versions will work, but the cheesecake will be less rich.
- Double cream: Heavy cream is a perfect substitute.
- Mini Eggs: Any small candy-coated chocolate will work for decoration.
- Lemon juice: Adds brightness; optional if preferred sweeter.
Step-by-Step Instructions
Step 1 – Prepare the Base
- Crush the digestive biscuits into fine crumbs using a food processor or a rolling pin.
- Mix the crumbs with melted butter until evenly combined.
- Press the mixture firmly into the bottom of a 7-inch (18 cm) springform pan or cake tin.
- Chill in the fridge while preparing the filling.
Step 2 – Make the Cheesecake Filling
- Chop 360 g of Mini Eggs roughly.
- Whip double cream until soft peaks form, reserving 2–3 tablespoons for decoration.
- In a separate bowl, mix cream cheese, icing sugar, and lemon juice until smooth.
- Fold the whipped cream gently into the cream cheese mixture, then fold in the chopped Mini Eggs.
Step 3 – Assemble the Cheesecake
- Spread the filling evenly over the chilled base.
- Smooth the top with a spatula and chill in the fridge for at least 3 hours, preferably overnight.
Step 4 – Decorate
- Remove the cheesecake from the pan using a warm knife around the edge.
- Pipe or dollop the reserved whipped cream on top.
- Scatter the remaining Mini Eggs in a decorative pattern.
Pro Tips for Success
- Soft Peaks Only – Over-whipping cream can cause the filling to collapse.
- Chill Time is Key – Ensure the cheesecake is fully set for easy slicing.
- Warm Knife Trick – Run a knife under hot water for smooth edges when cutting.
- Make Ahead – The cheesecake tastes even better after a few hours of chilling.
- Customize – Add a layer of crushed chocolate or caramel for extra indulgence.
Flavor Variations
- Chocolate Lover’s – Fold in mini chocolate chips or a drizzle of melted chocolate.
- Caramel Twist – Swirl caramel sauce into the filling before chilling.
- Nutty Surprise – Add finely chopped toasted hazelnuts or almonds to the base.
- Berry Burst – Top with fresh raspberries or strawberries for tart contrast.
Serving Suggestions
- Slice into 12-16 portions for parties.
- Pair with a scoop of vanilla ice cream or fresh whipped cream for extra indulgence.
- Serve on a decorative Easter platter with extra Mini Eggs around the edges.
Storage and Freezing Instructions
- Refrigerate: Keep in an airtight container for up to 3 days.
- Freeze: Freeze undecorated cheesecake for up to 2 months. Thaw in the fridge overnight, then decorate before serving.
- Tip: Avoid freezing Mini Eggs on top; they can crack or lose their candy coating.
Nutrition Facts (Per Serving, 12 Servings)
| Nutrient | Amount |
|---|---|
| Calories | 450 kcal |
| Protein | 5 g |
| Carbohydrates | 32 g |
| Fat | 33 g |
| Fiber | 1 g |
| Sodium | 150 mg |
Note: Values are approximate and may vary based on specific brands used.
FAQ About Easy No-Bake Mini Egg Easter Cheesecake
Can I make this cheesecake ahead of time?
Absolutely! It’s perfect for making a day or two in advance. The flavors develop beautifully, and it sets perfectly in the fridge.
Can I substitute Mini Eggs with another chocolate?
Yes! Any small, candy-coated chocolate or chopped milk chocolate works well. Just choose your favorite festive colors for visual impact.
Is it possible to make this gluten-free?
Definitely. Swap the digestive biscuits for gluten-free cookies or graham crackers. The cheesecake will set the same way and still taste delicious.
Can I use low-fat cream cheese or cream?
Yes, but note that the cheesecake will be slightly less rich and creamy. Full-fat versions give the best texture and flavor.
How do I prevent the cheesecake from collapsing?
Ensure you fold in the whipped cream gently and chill it fully before serving. Over-whipping or rushing the process can affect structure.
Easy No-Bake Mini Egg Easter Cheesecake
Equipment
- food processor or rolling pin for crushing biscuits
- mixing bowls
- electric mixer for whipping cream
- 7-inch springform pan
- spatula
- refrigerator for chilling
Ingredients
- 280 g digestive biscuits
- 140 g unsalted butter, melted
- 560 g full-fat cream cheese
- 600 ml double cream
- 140 g icing sugar, sifted
- 1/2 lemon (juice)
- 360 g Cadbury Mini Eggs, chopped
- 270 g Mini Eggs (for decoration)
- reserved whipped cream for topping
Instructions
- Crush the digestive biscuits into fine crumbs using a food processor or rolling pin.
- Mix the crumbs with melted butter until fully combined.
- Press the mixture firmly into the bottom of a 7-inch springform pan.
- Chill in the fridge while preparing the filling.
- Chop 360 g of Mini Eggs roughly.
- Whip the double cream until soft peaks form, reserving a small amount for decoration.
- In a separate bowl, mix cream cheese, icing sugar, and lemon juice until smooth.
- Fold the whipped cream into the cream cheese mixture, then fold in chopped Mini Eggs.
- Spread the filling evenly over the chilled base.
- Smooth the top and chill in the fridge for at least 3 hours, preferably overnight.
- Remove the cheesecake from the pan using a warm knife around the edge.
- Pipe or spoon reserved whipped cream on top.
- Decorate with remaining Mini Eggs and serve.
Notes
Nutrition
Final Thoughts
This easy no-bake Mini Egg Easter cheesecake recipe is a simple yet stunning dessert that’s perfect for celebrating Easter with family and friends. With its creamy filling, crunchy base, and festive Mini Egg topping, it’s both a feast for the eyes and a treat for the taste buds. Best of all, it requires minimal effort and no baking — so you can spend more time enjoying the holiday instead of the kitchen.