

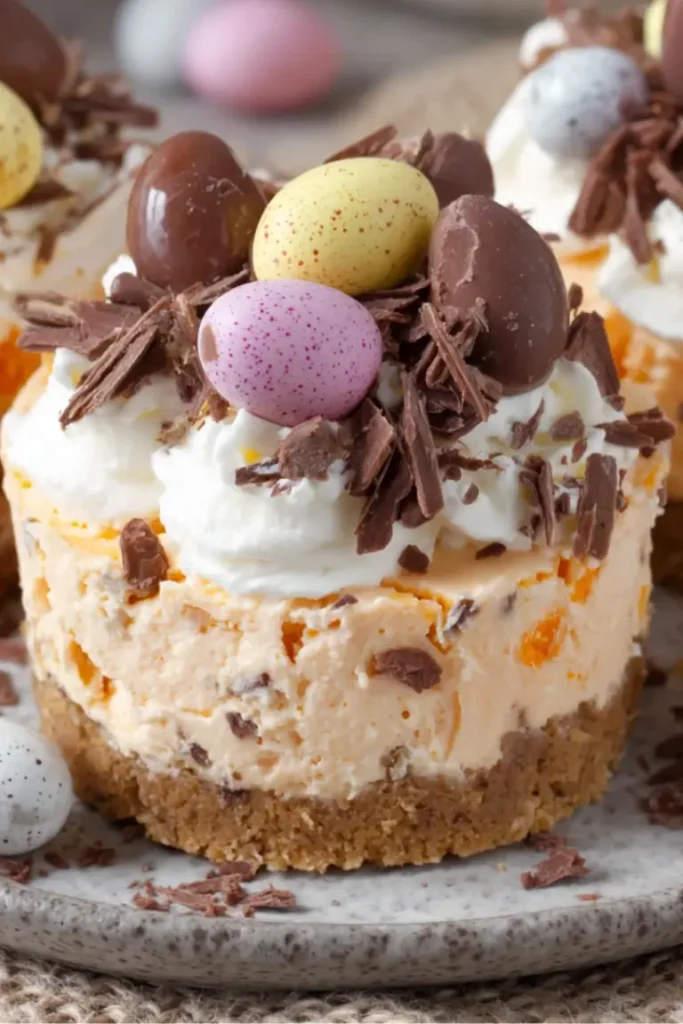
If you’re looking for a quick and festive dessert, these Easy Mini Egg Cheesecake Cups are the perfect solution. Bite-sized, creamy, and topped with colorful chocolate mini eggs, they’re ideal for Easter celebrations, parties, or anytime you want a sweet treat that impresses without the fuss.
Why You’ll Love These Mini Egg Cheesecake Cups

These mini cheesecakes are a crowd-pleaser for several reasons:
- No baking required – The creamy cheesecake filling sets in the fridge, making preparation simple.
- Festive and fun – Crushed chocolate mini eggs folded into the filling add surprise bites of chocolate in every spoonful.
- Portion-controlled – Perfect for individual servings, so everyone can grab their own.
- Customizable – You can swap toppings or mix-ins to suit your taste or dietary needs.
- Rich and creamy – The whipped cream folded into the cream cheese filling makes each cup light yet indulgent.
Ingredients for Mini Egg Cheesecake Cups
Biscuit Base
- 1½ cups digestive biscuits or graham crackers, crushed
- ½ cup unsalted butter, melted
Cheesecake Filling
- 300g cream cheese, softened
- ¾ cup powdered sugar
- 1 tsp vanilla extract
- 1 cup heavy cream, cold
- ¾ cup chocolate mini eggs, crushed
Toppings & Garnish
- ½ cup mini eggs (for topping)
- ¼ cup chocolate shavings
- Extra whipped cream
Ingredient Notes
- Digestive biscuits or graham crackers: Either works; choose a lightly sweetened option for a balanced flavor.
- Cream cheese: Room temperature ensures smooth mixing.
- Heavy cream: Cold cream whips better and holds its shape.
- Mini eggs: Crush gently to keep some larger pieces for texture.
- Substitutions: For a dairy-free version, use plant-based cream cheese and coconut cream. Vegan biscuits can replace the traditional ones.
Step-by-Step Instructions
Step 1 – Prepare the Biscuit Base
- Combine crushed biscuits and melted butter in a bowl until the texture resembles wet sand.
- Spoon the mixture into individual serving cups or jars.
- Press down firmly to form the base layer.
- Chill in the refrigerator for 20–30 minutes to set.
Step 2 – Make the Cheesecake Filling
- Beat cream cheese, powdered sugar, and vanilla extract in a large bowl until smooth and creamy.
- In a separate bowl, whip the cold heavy cream to stiff peaks.
- Gently fold the whipped cream into the cream cheese mixture until light and fluffy.
Step 3 – Add Mini Eggs and Assemble
- Fold the crushed chocolate mini eggs evenly into the filling.
- Spoon or pipe the cheesecake mixture over the chilled biscuit bases.
- Smooth the tops with a spatula.
- Refrigerate for at least 4–5 hours until fully set.
Step 4 – Decorate and Serve
- Top each cup with a swirl of whipped cream.
- Add whole mini eggs and sprinkle chocolate shavings on top.
- Serve chilled for a rich, creamy, and festive dessert experience.
Pro Tips for Success
- Chill the cups well – Giving the cheesecake enough time to set ensures clean slices and firm texture.
- Fold, don’t stir – Gently folding the whipped cream prevents deflating the filling.
- Use a piping bag – For a polished presentation, pipe the cheesecake mixture onto the bases.
- Crush mini eggs carefully – Leaving some larger pieces creates fun texture in each bite.
- Make ahead – These can be prepared the night before, making them ideal for entertaining.
- Room temperature cream cheese – Softened cream cheese blends smoother and avoids lumps.
Flavor Variations
- Caramel Mini Cheesecakes – Drizzle caramel sauce over the tops before serving.
- Nutty Chocolate – Fold in chopped toasted hazelnuts or almonds with the mini eggs.
- Berry Surprise – Add a layer of fresh raspberries or strawberries between the base and filling.
- Mint Chocolate – Mix crushed mint chocolate into the cheesecake for a refreshing twist.
Serving Suggestions
- Serve straight from the fridge in individual cups for parties.
- Add a small mint leaf or edible flower for a decorative touch.
- Pair with a hot chocolate or coffee for a cozy dessert experience.
Storage and Freezing Instructions
- Refrigerator: Store in an airtight container for up to 4 days.
- Freezer: Cheesecakes can be frozen without toppings for up to 1 month. Thaw in the fridge before adding whipped cream and mini eggs.
Nutrition Facts (Per Serving)
| Nutrient | Amount |
|---|---|
| Calories | 320 kcal |
| Protein | 4 g |
| Carbs | 25 g |
| Fat | 23 g |
| Fiber | 1 g |
| Sodium | 180 mg |
FAQ About Mini Egg Cheesecake Cups
How long do mini cheesecakes last?
When stored in the refrigerator, they remain fresh for 3–4 days. For longer storage, freeze without toppings for up to a month.
Can I make them ahead of time?
Yes! Prepare the bases and filling a day in advance, then decorate just before serving for the best presentation.
Can I use other candies instead of mini eggs?
Absolutely! Chocolate chips, crushed candy bars, or seasonal candies can all be used as mix-ins or toppings.
Are these mini cheesecakes gluten-free?
Not as written—digestive biscuits contain gluten. Substitute with gluten-free biscuits to make the recipe safe for gluten-free diets.
Can I make a dairy-free version?
Yes. Use plant-based cream cheese, coconut cream, and vegan biscuits to make the recipe completely dairy-free.

Easy Mini Egg Cheesecake Cups
Equipment
- mixing bowls
- electric mixer
- spatula
- serving cups or jars
- refrigerator
Ingredients
- 1½ cups digestive biscuits or graham crackers, crushed
- ½ cup unsalted butter, melted
- 300 g cream cheese, softened
- ¾ cup powdered sugar
- 1 tsp vanilla extract
- 1 cup heavy cream, cold
- ¾ cup chocolate mini eggs, crushed
- ½ cup mini eggs for topping
- ¼ cup chocolate shavings
- extra whipped cream (optional)
Instructions
- Combine crushed biscuits and melted butter in a bowl until texture resembles wet sand.
- Spoon the mixture into individual cups or jars and press firmly to form base. Chill for 20–30 minutes.
- Beat cream cheese, powdered sugar, and vanilla until smooth.
- Whip the cold heavy cream to stiff peaks, then gently fold into cream cheese mixture.
- Fold crushed chocolate mini eggs into the cheesecake filling.
- Spoon or pipe filling over chilled biscuit bases and smooth the tops.
- Refrigerate for 4–5 hours until fully set.
- Top each cup with whipped cream, mini eggs, and chocolate shavings before serving.
Notes
Nutrition
Final Thoughts
These Easy Mini Egg Cheesecake Cups are a simple yet festive dessert that everyone will love. With a crunchy biscuit base, creamy filling, and chocolatey mini egg surprises, they’re perfect for celebrations or just treating yourself. Minimal prep, no baking, and easy customization make them an essential dessert recipe for your collection.