

If you’re craving a restaurant-style Tex-Mex dinner at home, these Easy Crispy Beef and Cheese Chimichangas deliver bold flavor, crunchy texture, and comforting, cheesy goodness in every bite. Stuffed with seasoned ground beef, refried beans, and melted cheese, then fried until golden brown, this classic dish is surprisingly simple to make and always a crowd-pleaser.
Why You’ll Love This Easy Crispy Beef and Cheese Chimichangas Recipe

There are so many reasons this recipe deserves a permanent place in your dinner rotation. First, it’s incredibly satisfying — the contrast between the crispy tortilla and the warm, savory filling is unbeatable. Second, the ingredients are easy to find and affordable, making it perfect for busy weeknights or casual entertaining.
You’ll also love how customizable these chimichangas are. You can adjust the spice level, swap proteins, or even bake or air-fry them if you prefer a lighter option. Best of all, this recipe brings restaurant-quality flavor to your kitchen with straightforward steps and no complicated techniques.
Ingredients for Easy Crispy Beef and Cheese Chimichangas
For the Beef Filling
- 1 pound lean ground beef
- 1 small onion, finely diced
- 2 cloves garlic, minced
- 1 teaspoon chili powder
- 1 teaspoon ground cumin
- ½ teaspoon dried oregano
- Salt and black pepper, to taste
- 1 can (10 oz) diced tomatoes with green chiles, drained
- 1 cup refried beans
For Assembly
- 8 large flour tortillas
- 2 cups shredded cheddar cheese (or Mexican blend)
- Vegetable oil, for frying
Optional Toppings
- Sour cream
- Guacamole
- Salsa or pico de gallo
- Shredded lettuce
- Diced tomatoes
Ingredient Notes and Substitutions
- Ground Beef: Lean ground beef works best to avoid excess grease. You can substitute ground chicken or ground turkey for a lighter option.
- Cheese: Cheddar provides a sharp, classic flavor, but Monterey Jack or a Mexican cheese blend melts beautifully as well.
- Refried Beans: Use traditional or vegetarian refried beans depending on your preference.
- Tortillas: Large, burrito-size flour tortillas are essential for holding the filling securely.
- Healthier Swap: For a family-friendly alternative to deep frying, these chimichangas can be baked or air-fried with excellent results.
Step-by-Step Instructions
Step 1 – Cook the Beef Filling
Heat a large skillet over medium heat. Add the ground beef and diced onion, cooking until the beef is browned and the onion is soft. Break the meat apart as it cooks. Drain any excess grease from the pan.
Stir in the garlic, chili powder, cumin, oregano, salt, and pepper. Cook for about 30 seconds, just until fragrant.
Step 2 – Add Beans and Tomatoes
Add the drained diced tomatoes with green chiles and the refried beans to the skillet. Stir well until everything is evenly combined and heated through. Remove from heat and allow the filling to cool slightly — this makes assembly easier.
Step 3 – Assemble the Chimichangas
Lay a tortilla flat on a clean surface. Spoon about ½ cup of the beef mixture into the center. Sprinkle generously with shredded cheese.
Fold the sides of the tortilla inward, then roll it up tightly from the bottom, burrito-style. Repeat with the remaining tortillas and filling.
Step 4 – Fry Until Crispy
In a deep skillet or heavy pot, heat about 1 inch of vegetable oil to 350°F (175°C). Carefully place chimichangas seam-side down into the hot oil, working in batches to avoid overcrowding.
Fry for 2–3 minutes per side, or until golden brown and crispy. Use tongs to turn them gently.
Step 5 – Drain and Serve
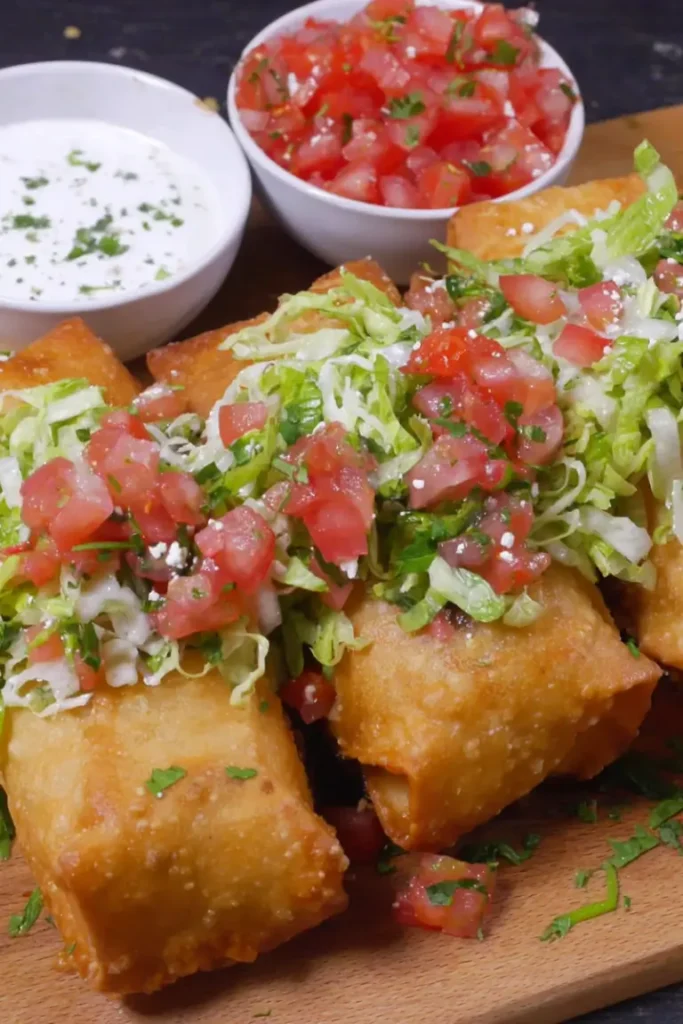
Remove the chimichangas and place them on a plate lined with paper towels to drain excess oil. Serve hot with your favorite toppings.
Pro Tips for Success
- Don’t Overfill: Too much filling can cause the tortilla to tear or leak during frying.
- Seal the Seam: Place chimichangas seam-side down first in the oil to help seal them shut.
- Maintain Oil Temperature: If the oil is too cool, the chimichangas will absorb oil and become greasy.
- Warm Tortillas First: Slightly warm tortillas in the microwave so they roll without cracking.
- Work in Batches: Overcrowding the pan lowers oil temperature and affects crispiness.
Flavor Variations
- Spicy Beef Chimichangas: Add diced jalapeños or a pinch of cayenne pepper to the filling.
- Southwest Style: Mix in corn and black beans for extra texture and flavor.
- Cheesy Deluxe: Add cream cheese or queso to the beef mixture for extra creaminess.
- Chicken Chimichangas: Substitute cooked, shredded chicken seasoned with taco spices.
- Vegetarian Version: Use seasoned lentils or sautéed mushrooms instead of beef.
Serving Suggestions
These Easy Crispy Beef and Cheese Chimichangas are hearty enough to stand alone, but they pair wonderfully with classic sides. Serve them with Mexican rice, cilantro-lime rice, or refried beans for a complete meal. A simple side salad or roasted vegetables can balance the richness.
For entertaining, slice the chimichangas in half and serve them on a platter with multiple dipping sauces like salsa, sour cream, and guacamole.
Storage and Freezing Instructions
- Refrigerator: Store leftover chimichangas in an airtight container for up to 3 days. Reheat in the oven or air fryer to restore crispiness.
- Freezer: Assemble chimichangas without frying, wrap tightly in foil or plastic wrap, and freeze for up to 2 months.
- To Cook from Frozen: Bake at 400°F (205°C) until heated through and crispy, or fry carefully until golden.
Nutrition Facts (Per Serving)
| Nutrient | Amount |
|---|---|
| Calories | ~430 |
| Protein | ~22 g |
| Carbohydrates | ~32 g |
| Fat | ~24 g |
| Fiber | ~5 g |
| Sodium | ~720 mg |
Values are estimates and will vary based on ingredients used.
FAQ About Easy Crispy Beef and Cheese Chimichangas
What makes a chimichanga different from a burrito?
A chimichanga is essentially a burrito that has been fried until crispy. The frying process creates a crunchy exterior while keeping the inside warm and cheesy, which sets it apart from a soft burrito.
Can I bake chimichangas instead of frying?
Yes, baking is a great alternative. Brush the assembled chimichangas with oil and bake at 400°F (205°C) for about 20–25 minutes, turning once, until crispy and golden.
How do I keep chimichangas from opening while frying?
Rolling them tightly and placing them seam-side down first in the oil helps seal them. You can also secure them briefly with toothpicks, removing them after frying.
Are chimichangas spicy?
This recipe is mildly spiced and family-friendly. You can easily adjust the heat level by adding or reducing spices and chiles.
Can I make chimichangas ahead of time?
Absolutely. You can prepare and assemble them a day ahead, store them in the refrigerator, and fry or bake just before serving.

Easy Crispy Beef and Cheese Chimichangas
Equipment
- large skillet
- deep skillet or heavy pot
- tongs
- paper towels
Ingredients
- 1 lb lean ground beef
- 1 small onion, finely diced
- 2 cloves garlic, minced
- 1 tsp chili powder
- 1 tsp ground cumin
- 0.5 tsp dried oregano
- salt and black pepper, to taste
- 10 oz diced tomatoes with green chiles, drained
- 1 cup refried beans
- 8 large flour tortillas
- 2 cups shredded cheddar cheese or Mexican blend
- vegetable oil, for frying
Instructions
- Heat a large skillet over medium heat. Cook the ground beef and diced onion until the beef is browned and the onion is soft. Drain excess grease, then stir in garlic, chili powder, cumin, oregano, salt, and pepper until fragrant.
- Add the drained diced tomatoes with green chiles and the refried beans. Stir until evenly combined and heated through. Remove from heat and let cool slightly.
- Spoon about 1/2 cup of filling onto each tortilla and sprinkle with shredded cheese. Fold in the sides and roll up tightly burrito-style.
- Heat about 1 inch of vegetable oil to 350°F (175°C). Fry chimichangas seam-side down in batches for 2–3 minutes per side until golden and crispy.
- Drain chimichangas on paper towels and serve hot with desired toppings.
Notes
Nutrition
Final Thoughts
These Easy Crispy Beef and Cheese Chimichangas bring together everything we love about Tex-Mex comfort food: bold seasoning, melty cheese, and irresistible crunch. Whether you’re making them for a casual family dinner or a fun weekend treat, this recipe is reliable, flexible, and incredibly satisfying. Once you try them at home, you may never need takeout again.